How to Slip Bobber Fish for Crappie
There's nothing quite as frustrating as trying to fish for crappie when they're holding deep or suspended in cover, and your traditional fixed bobber just isn't cutting it. You try to cast it, and your bait is either way too shallow or you can't even get it out there without tangling. This guide is all about equipping you with the knowledge to master slip bobber fishing, a technique that opens up a whole new world of crappie opportunities in Arkansas's diverse waters, helping you present your bait precisely where those slabs are hiding.
Why Slip Bobbers Are a Game Changer for Crappie Fishing
Let's be real, a fixed bobber has its place, especially for panfishing with the grandkids right off the dock. But when you're serious about finding those elusive crappie, or when they've moved off the banks into deeper water, a fixed bobber quickly becomes a huge limitation. This is where the magic of a slip bobber truly shines, transforming your approach and letting you reach fish you simply couldn't before.
The Frustration of Fixed Bobbers in Deeper Water
Imagine this common scenario: you're out on Lake Ouachita or DeGray Lake, and your electronics are showing crappie suspended 15 feet down over a brush pile that's in 25 feet of water. You've got your trusty fixed bobber rig, but you can't set it to 15 feet because your rod is only 7 feet long. Trying to cast a rig with 15 feet of line dangling below a fixed bobber is an exercise in futility, ending in tangles, frustration, and probably a few choice words muttered under your breath. It's awkward, it's inefficient, and it severely limits your ability to present your bait accurately at the depth the crappie are actually feeding. You end up either fishing too shallow and catching nothing, or just giving up on that specific spot entirely.
This limitation is exactly why many anglers miss out on some of the best crappie fishing. The fish aren't always going to be in easily accessible shallow water, especially after the When Do Crappie Spawn in Arkansas period when they move back to deeper haunts. Relying solely on a fixed bobber often means you're only fishing a small fraction of the water column, leaving countless crappie unmolested. It’s like trying to bail out a leaky boat with a teacup – you're working hard, but you're not getting the job done effectively.
Unlocking New Depths and Fishing Structures
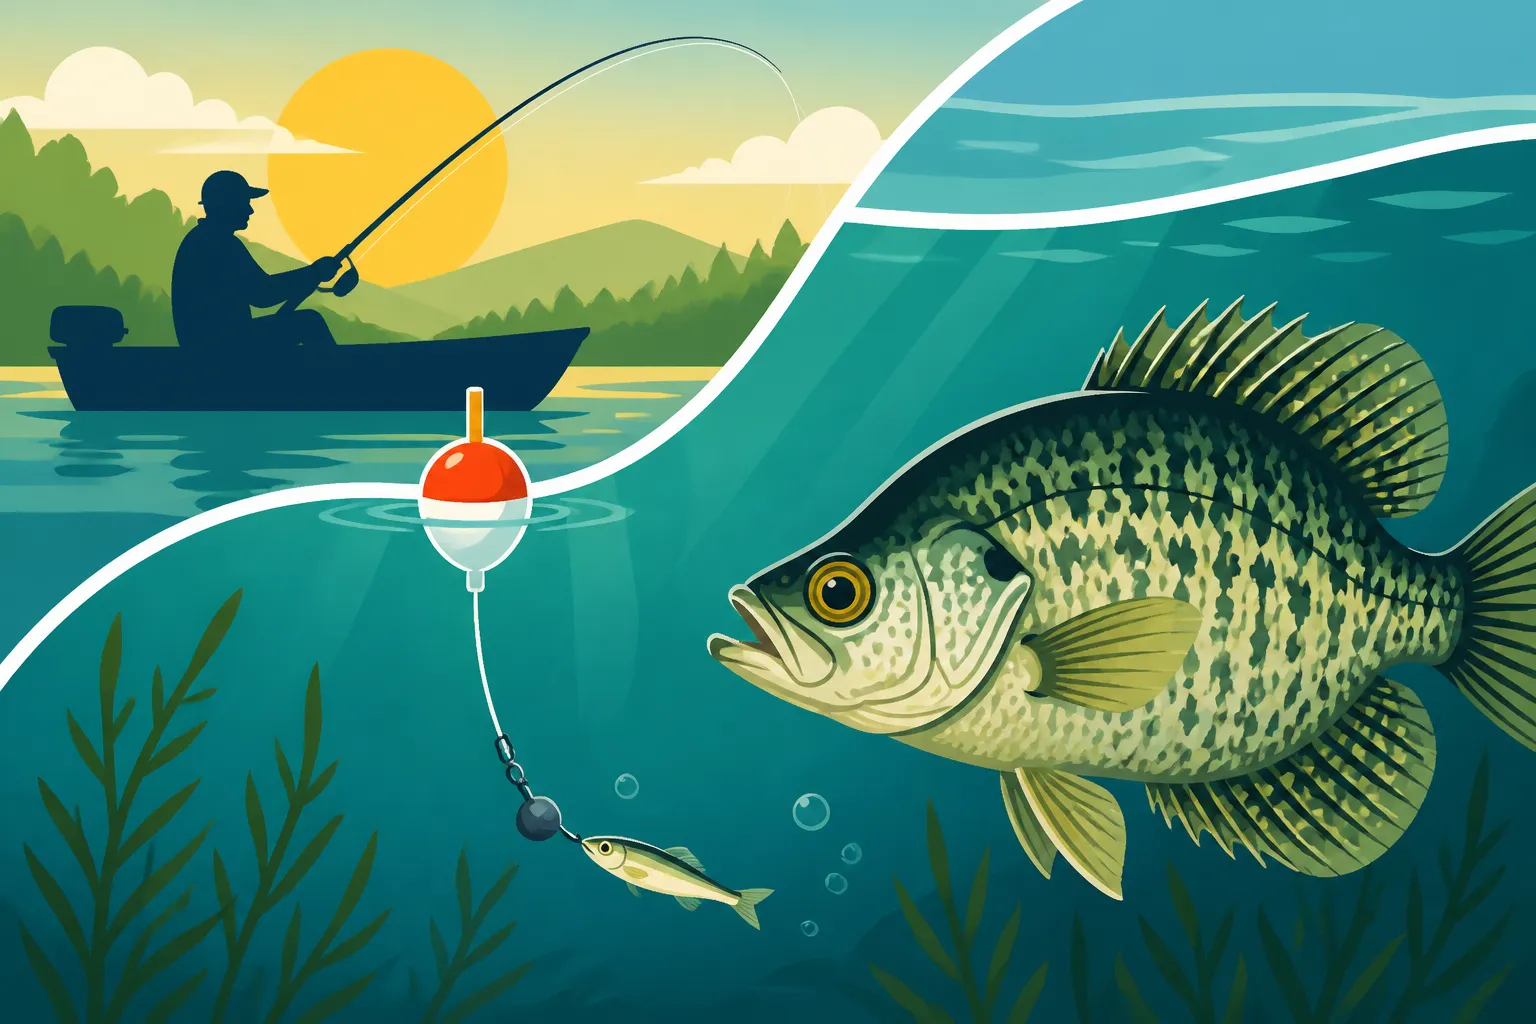
A slip bobber rig, however, solves this problem beautifully. Instead of the bobber being fixed at one point on your line, it "slips" freely up and down the line until it hits a small stopper knot, which you place at your desired depth. This means you can reel your hook and weight right up to the bobber for an easy, tangle-free cast, regardless of how deep you plan to fish. Once it hits the water, the weight pulls your bait down, and the bobber simply slides up the line until it reaches that stopper knot, suspending your bait at the precise depth you've set.
This ability to fish virtually any depth with ease is revolutionary for crappie anglers. Think about those submerged timber stands in Lake Conway, or the deep brush piles on Beaver Lake; these are prime crappie real estate, but often inaccessible with a fixed bobber. With a slip bobber, you can fish right above or within that structure, getting your bait into the strike zone without constantly snagging. It opens up access to deep channels, river bends, and offshore humps where big crappie often congregate. This versatility is key to consistent success, allowing you to adapt to changing fish patterns and depths throughout the seasons.
Stealth and Presentation Advantages
Beyond just reaching deeper depths, slip bobbers offer a significant advantage in terms of bait presentation and stealth. A fixed bobber, especially a larger one, can create a lot of splash and commotion when it hits the water, potentially spooking wary crappie. Since a slip bobber travels down the line after the weight, you can often use a much lighter, more sensitive bobber that lands softly, creating less disturbance. This subtle entry is particularly important in clear waters or when fishing highly pressured areas.
Furthermore, a slip bobber allows for a much more natural drift of your bait. In currents, the bobber can float along, gently presenting your jig or minnow as if it were free-floating prey. This natural movement is incredibly enticing to crappie. You can also hold your rod tip high and use the wind to slowly drag your bobber across a flat, covering more water and enticing bites. The overall presentation is smoother, quieter, and more natural, leading to more strikes from even the pickiest crappie. It truly enhances your ability to trick those slabs into biting, making your fishing experience more productive and, let's face it, a lot more fun.
Essential Gear for Slip Bobber Crappie Fishing
Getting set up for slip bobber fishing isn't overly complicated, but having the right tools for the job makes a world of difference. You don't need to break the bank, but investing in a few key pieces of specialized gear will improve your success rate and make your time on the water much more enjoyable. Think about it: trying to drive a nail with a screwdriver usually just ends in bent nails and frustration. Same goes for fishing with the wrong gear.
Choosing the Right Rod, Reel, and Line
For crappie fishing with a slip bobber, your rod choice is pretty crucial. You want something with a fast or moderate-fast action, which means the tip bends easily but the backbone is still strong enough to set the hook. A lighter power rod (light or ultralight) is ideal because crappie often have a very subtle bite, and a sensitive tip will help you detect it. Length is also important; a longer rod, say 6.5 to 7.5 feet, helps with casting distance and mending line, especially when you're fishing deeper water. For a good selection, check out options on Amazon; they have plenty of sensitive graphite rods that are perfect for crappie.
When it comes to the reel, a small spinning reel in the 1000 to 2000 size range is perfect. These reels are lightweight, balance well with lighter rods, and typically have a smooth drag system, which is important when you hook into a larger crappie. As for line, many crappie anglers prefer monofilament in 4 to 6-pound test. Monofilament has some stretch, which can be forgiving with crappie's paper-thin mouths, and it's generally easy to work with for bobber stops. Some anglers also opt for braided line with a fluorocarbon leader for increased sensitivity and strength, but mono is a great starting point for slip bobber rigs.
Selecting Your Slip Bobber and Bobber Stops
This is where the "slip" in slip bobber comes in! There are various styles of slip bobbers out there, from cylindrical to pear-shaped, weighted or unweighted. The key is to choose one that's sensitive enough to detect light bites but also has enough buoyancy to support your chosen weight and bait. If you're using a small crappie jig, a smaller, more sensitive bobber is best. For a minnow and a heavier split shot, you'll need a bobber with more float. Clear or natural-colored bobbers can be stealthier in clear water, while brighter colors are easier to see in low light or choppy conditions. Again, a quick browse on Amazon will show you a huge variety of options, many specifically designed for crappie.
The bobber stop is equally critical. These are typically small pieces of string, rubber, or plastic that you thread onto your main line. The stopper creates a knot or bead that's just large enough to prevent the slip bobber from sliding past it, effectively setting your depth. String bobber stops are very popular because they can be adjusted easily and will pass smoothly through your rod guides when you reel in. They usually come with a small plastic sleeve that helps you slide them onto your line. Make sure the bobber stop is snug enough not to move during casting or reeling, but still adjustable when you want to change depths. Always carry extras, as they can sometimes slip off or wear out.
Baits, Jigs, and Weights for Crappie
What you put under your bobber is just as important as the bobber itself. For crappie, live minnows are a classic choice and often incredibly effective. You can rig them through the lips or just behind the dorsal fin with a small, sharp hook (like a #4 or #6 Aberdeen or Kahle hook). Small jigs, especially those in the 1/32 to 1/8 ounce range, are also highly productive. You can tip these jigs with a small plastic grub, tube, or even a piece of Berkley PowerBait crappie nibbler. Experiment with different colors and profiles to see what the crappie prefer on any given day. If you're keen to learn more about jigging, check out How to Rig a Jig for Crappie Fishing.
For weights, you'll typically use small split shot or a small bullet sinker. The amount of weight depends on the size of your bait and bobber, and how fast you want your bait to sink. The goal is to use just enough weight to get your bait down to depth and cock your bobber properly (usually standing upright with the very top visible) without making it too heavy and insensitive. A common setup is to use one or two small split shots a foot or so above your hook or jig. If you're fishing in current or need to get down fast, a slightly heavier bullet sinker might be better. Just be mindful of the Crappie must be 9 inches or longer to keep in Arkansas and Statewide crappie daily limit is 20 fish in most Arkansas waters rules once you start pulling them in!
Step-by-Step Guide to Setting Up Your Slip Bobber Rig
Alright, you've got your gear. Now let's get down to business and assemble this rig. Don't worry, it's not rocket science, and once you do it a couple of times, it'll become second nature. The key is to take your time and make sure each component is secured properly. A poorly tied knot or a loose bobber stop can lead to lost fish and wasted time.
Attaching Your Bobber Stop and Bead
The very first thing you'll do is put your bobber stop onto your main fishing line. If you're using a string bobber stop, it usually comes with a small plastic tube. You'll thread your main line through this tube, then slide the string knot off the tube and onto your main line. Gently pull both tag ends of the string knot to tighten it onto your line. Don't overtighten it just yet, as you'll want to adjust it later. The beauty of these string stops is that they're adjustable, allowing you to change your fishing depth on the fly.
Immediately below your bobber stop, you'll slide on a small bead. This bead is super important! The hole in your slip bobber is usually larger than the bobber stop knot, and without the bead, the bobber would slide right over the stop. The bead acts as a buffer, creating a larger surface for the bobber to rest against. Make sure the bead is small enough to pass through your rod guides easily but large enough to stop the bobber. You can often find these beads in small assortments at tackle shops or even on Amazon, often labeled as "slip bobber beads."
Threading the Line Through the Bobber
Once your bobber stop and bead are on, it's time for the star of the show: the slip bobber itself. Most slip bobbers have a small hole running through their center. You'll simply thread your main line through this hole, from top to bottom. That's it! There's no fancy knotting here, which is why it's called a "slip" bobber – it literally slips up and down the line.
When you're threading the line, make sure it moves freely through the bobber. Sometimes, if the hole is a bit tight, you might need to gently work the line through. The bobber should be able to slide effortlessly between the bead (which is above it) and whatever you tie on next (your hook or swivel). This free movement is what allows you to reel your bait right up to the bobber for casting, then let it slide down to your desired depth once it's in the water. It’s simple, yet brilliant.
Tying on Your Weight and Hook/Jig
Now you're nearing completion! After your slip bobber is threaded, you'll tie on your terminal tackle. This typically involves a small swivel, a weight, and then your hook or jig. A small swivel can be a good idea, especially if you're using live bait that might twist your line. Tie your main line to one end of the swivel using a strong fishing knot like a Palomar or an improved clinch knot.
Below the swivel, you'll attach your weight. This could be one or more split shot pinched onto the line a foot or so above your hook, or a small bullet sinker. Then, at the very end of your line, tie on your hook or crappie jig. If you're using a jig, you can tie it directly to the line. If you're using a bare hook for live minnows, you'll obviously tie that on. Always make sure your knots are tight and secure, and trim any excess tag ends.
Here's a quick summary table of the setup:
| Component | Purpose | Placement on Line | Key Tip |
|---|---|---|---|
| Bobber Stop | Sets the maximum depth your bait will sink | First on line, adjustable | Use string stops for easy adjustment and rod guide passage. |
| Bead | Prevents bobber from sliding over bobber stop | Immediately below bobber stop | Must be larger than bobber stop knot, smaller than rod guides. |
| Slip Bobber | Indicates bites, supports bait at depth | Slides freely after the bead | Choose based on bait weight and desired sensitivity. |
| Weight | Pulls bait down to desired depth | Below bobber, above hook/jig | Use just enough to cock the bobber, not too much. |
| Hook/Jig | Holds bait/attracts fish | At the very end of the line | Match to bait size and target species (crappie). |
Now your rig is complete and ready to hit the water! This setup allows you to cast smoothly and then present your bait at whatever depth those crappie are lurking, from a few feet down to much deeper water.
Mastering the Art of Slip Bobber Crappie Fishing
Setting up the rig is one thing, but knowing how to use it effectively is where the real fun begins. Slip bobber fishing for crappie isn't just about putting a bobber on your line; it's about precision, observation, and understanding crappie behavior. It’s like being a detective, constantly looking for clues and adjusting your strategy.
Finding the Crappie and Setting Your Depth
The first step to success is always finding the fish. Crappie are structure-oriented, meaning they love to hang around cover like brush piles, submerged trees, dock pilings, and ledges. How to Find Crappie in Deep Water is a crucial skill here. Use your boat's electronics (fish finder/sonar) to locate schools of crappie or areas with significant underwater structure. Look for "arches" or "blobs" that indicate fish, paying attention to the depth at which they are suspended. Sometimes they'll be right on the bottom, other times they might be halfway up the water column.
Once you've identified a promising spot and estimated the depth where the crappie are holding, you can adjust your bobber stop. If crappie are showing up at 12 feet, slide your bobber stop knot to 12 feet from your hook. It's often a good idea to start a foot or two above where you see them, and then work your way down. Crappie often feed upwards, so presenting your bait slightly above them can be very effective. Don't be afraid to experiment with depth, especially if you're not getting bites. A change of even six inches can make all the difference. Remember, the goal is to get your bait right in front of their faces without snagging on the structure they're hiding in.
Presenting Your Bait Naturally
With a slip bobber, you have incredible control over your bait's presentation. After casting, allow your bait to sink unimpeded until the bobber stop hits the bobber, suspending your bait at the chosen depth. Keep an eye on your line as it sinks; sometimes a crappie will grab the bait on the fall! Once the bobber settles, observe its movement. The key is to make your bait look as natural as possible.
If you're using live minnows, their natural movements will do most of the work for you. If you're using a jig, you might want to impart a subtle action. A very slow, gentle retrieve, a slight twitch of the rod tip, or just letting it drift naturally with the wind or current can be highly effective. This technique is especially potent when targeting crappie that are suspended in timber. You can cast your jig right into the thick stuff, let it sink to the desired depth, and then hold it there, gently twitching it to entice a strike. Avoid aggressive, erratic movements, as crappie are often more finicky than bass. Think subtle, enticing movements that mimic dying baitfish or insects. For more specific jigging tactics, check out Crappie Jigging Basics for Beginners.
Reading the Bite and Setting the Hook
Crappie bites can range from an aggressive yank to a barely perceptible twitch. This is where the sensitivity of your rod and the visibility of your slip bobber come into play. A typical crappie bite will cause your bobber to dip, slide sideways, or slowly sink. Sometimes, it might just barely twitch or lie flat on the water. In colder water or when fish are lethargic, the bite can be incredibly light, so you have to pay close attention.
When you see any unusual movement in your bobber, or if it disappears under the water, it's time to set the hook. Crappie have very soft mouths, so a hard, aggressive hook set can actually tear the hook out. Instead, use a firm, sweeping motion with your rod tip. Raise your rod smoothly and assertively to bury the hook. Once you have the fish on, keep steady pressure to guide it in, but don't try to horse it. Those paper-thin mouths can give way if you pull too hard. Many experienced crappie anglers prefer a slightly softer rod tip to absorb some of that shock during the fight. Once you get that crappie to the boat, make sure it meets the Minimum Size Limit for Keeping Crappie in Arkansas before you put it in the livewell. Happy slip bobber fishing!
Disclaimer
This article is for general informational purposes only and does not constitute professional advice. Laws, prices and regulations vary by location and change over time. Consult a qualified professional for guidance on your specific situation.